Showing posts with label garden. Show all posts

July 5, 2021

Preserving Kale

Kale is a great, easy veggie to grow in any garden and it's easy to preserve.  I like a flat leaf kale for preserving.  This year I grew purple leaf kale, as well as a curly leaf for fresh eating.

Before you start ... wash out the sink and get your equipment read.  Large pot, metal colander, slotted spoon, towels, ziplock baggies and sharpie.

Here are the steps for processing kale:

1. Wash and trim.  I harvest when the kale is not too big, so the ribs aren't very tough and I leave them in.  But you can trim the ribs out.

2.  Rinse again after you trim it.  Get all the dirt and bugs off.


3. Bring a pot of water to bowl and place a colander in the pot.

4. Add a couple handfuls of kale to the bowling water and push down with a spoon to submerge.  Set timer to 2 minutes.

5. While it boils, fill the sink with cold water and ice.


6. When 2 minutes are up, dump the kale into the cold water.  Return colander to boiling water and add a couple handfuls of kale.  Set timer to 2 minutes. 

7.  Scoop the blanched kale out of the sink and put on towels to drain.


8. Repeat until all the kale is blanched and draining.  You don't have to press the water out - it's ok if it's wet when you freeze it.

9.  Label the ziplock baggies.  I label all containers with what is in inside and the year I processed it.

10.  Grab a handful of blanched kale and place in a baggie.  I do one big handful per baggie.  Seal and stack.  Put in freezer.

I've kept the kale in the freezer for a year and it's still good.  Add to soups and stews all winter long.  And the final step is to give the leftovers to the chickens.


March 4, 2014

2014 Seeds

It's that time of year again.  Actually, I'm a little late.  I've been really enjoying winter, skiing most weekends, and not thinking about the garden.  But it's warmed up and the chickens are laying again, so spring is here.  And ... the Territorial Seed Company catalog came in the mail Saturday.  Gardener porn.

Last year, I saved seeds from my corn, green beans, wax beans and pie pumpkins.  My mom saved seeds from her loose-leaf lettuce.  This will be my first time grown veggies from seeds I saved.  I hope it works out.  If it does I'll save more and purchase less next time around.

Saved corn seeds
We also culled the seed list this year.  I always get excited about trying new things and about certain veggies that I love to eat, but only fresh.  This year, we decided to only grow what we will can or freeze.  Sure I may eat some fresh, but I'm not planting something I don't preserve.  For example, fennel.  I have a couple dishes that are yummy and use fresh fennel.  For those two dishes, which I make maybe once a year each, I'll just go to the produce market and buy fennel.
Some of preserved goods
So here it is, my seed list, with Territorial Seed ID numbers:
RD750/S Amethyst Radish
SQ790/L  Black Beauty Squash (zucchini)
BN046/L Black Coco Bean (shelling bean)
SQ801/S Cube of Butter Squash (summer squash)
PE631/P Dakota Peas (shelling peas)
KL363/S Nero Di Toscana Kale
LT407/L New Red Fire Lettuce
BT133/S Red Ace Beet
CR287/S Romance Carrots
CU299/L Wautoma Cucumbers
XP702/A Yukon Gold Potatoes

All that leaves to buy at the local feed store are tomato and green pepper starts.  I always grow Roma or San Morazano tomatoes - a nice plum tomato for saucing.

September 21, 2013

Attack of the Killer Tomatoes

There are two vegetables in the garden that frustrate me more than any other - corn and tomatoes.  Now corn I've come to grips with.  The problem is that we in the Pacific Northwest just don't have a long enough growing season to really do corn.  The "marine layer" of mist dampens our mornings and hides the sun.  The result is that we get our own corn every few years and the in between years we can corn from Yakima (they have awesome corn!).

The other vegetable, or to be truthful it's a fruit, that kills me are tomatoes.  In my whole adult life, there were only 2 years when I didn't plant at least one tomato plant.  And those were my first two years in college - in the dorms and then in a second story apartment (I didn't think of doing a container).  But my next apartment was on the ground floor and there was a little flower garden outside so I slipped a tomato plant in there.  And from then on, I have always had tomatoes ... but many years only green tomatoes.

I planted 10 tomato plants this year.  One was a sunglobe cherry, which always ripen and get eaten right down in the garden.  One was a heirloom large slicing variety.  The rest were Romas for saucing.  I'm in love with Roma tomatoes because they have thick skins that are easy to remove, lots of flesh and few seeds.  Also, they don't split easily in the rain like slicing tomatoes do.  But for some reason the Romas take for ever to ripen ... at least for me.

My mom lives about 30 minutes south of me, right near the Columbia River.  She plants stuff in containers on her back patio.  A month ago she was giving me bags of ripe Romas.  Mine were just getting to full size.  And, yes, we did plant at the same time.  And, yes, we both have about the same hours of sun on our gardens.

Now it's mid September and mine are finally starting to turn.  But now the rain is upon us and the leaves are wilting and some of the fruit are getting moldy in the dampness.  I'm resorting to bringing in any that have even the slightest hint of color and forcing them on the kitchen counter.


But at least I'm getting some this year.  I've already made one batch of sauce.  Many years, like last year and the year before that, none of my tomatoes ripened.  I tried every trick in the book:

  • pierce a hole in the stalk, 2 inches off the ground
  • stop watering
  • put red tarps underneath
  • put big black garbage bags over each
  • pull them and hang upside-down in the barn

Nothing worked.  In most cases the fruit would get black spots or start to mold.

Thankfully I have this awesome recipe for pickled green tomatoes.  But after two years of nearly all my tomatoes being pickled, the last thing I need are more. So my fingers are crossed that I'll get more red then green tomatoes.  


March 15, 2013

Lasagna Garden

We actually did this the fall before last, but I never really gave it a good write up.  Now after a full growing season and starting into the next, I feel secure is stating that yes, lasagna gardening has its merits.

What is lasagna gardening you may ask.  It's layering of different materials to create a weed barrier and great soil for a new garden (or row in your existing garden or new raised bed).  It can be done over any landscaped surface - lawns, weedy areas, bark dust, gravel.  I used the technique to expand our existing in-ground garden by 6 feet so that I could add two more rows of strawberries.  Since our garden is huge, it took a lot of materials.  Personally, while it worked well for us, I think this technique is best for smaller raised beds.

Materials:

  • cardboard, news paper or all-natural fiber cloth
  • sticks, pine cones, straw or dry leaves
  • compost
  • optional, soil

Steps:
  1. Pick your location.  For most garden plants you want at least 8 hours of direct sun, so that's the primary consideration.  But also think about access - can you get to and walk around the space easily.  And don't forget a water source because you don't want to be lugging water a long ways.
  2. Lay down the cardboard over the space you want to garden.  This is your weed barrier. If you are building a new raised bed, lay down the cardboard first and then build the sides of the bed over the top.  Make sure to over lap the cardboard a little so there aren't spaces for weeds/grass to come up through it.  If you are using news paper, make sure it's 5 sheets thick or more.  You want it to take at least two seasons for the newspaper to decompose, that time is important to make sure the weeds and grass die out.  An all-natural fiber cloth, like linen, burlap or even jeans, works really well too.  It can't contain any synthetic materials because those won't decompose over time.
  3. Next add about 4 inches worth of brown structure like twigs, pine cones, straw or dry leaves over the cardboard.  Don't tamp it down.  This layer is creates drainage under the compost and soil.  Most garden plants like to be damp but not sitting in puddles of water.
  4. Add 6 inches of compost.  We compost all our kitchen scraps along with animal (sheep and chicken) waste on site, so we have a lot, I mean A LOT, of compost for the garden.  I added it very fresh. In other words there were still banana peels visible.  Since I did this in the fall and let it rest all winter, I knew it would be composted by spring.  If you don't have a source of your own compost, go get some from your local nursery.
  5. If you are creating a new garden in the spring, you'll probably want to plant right away or at least in a few weeks.  I would recommend buying a compost/soil mix from the nursery.  They can help you decide how much compost-to-soil is best.  You want a minimum of 6 inches of material to plant in; more like 8 inches if you are planting root veggies like carrots.

That's it.  No tilling, just let it sit.  My fresh compost sat all winter and in the spring I transferred strawberry runners into two new rows.  We had a great harvest last year.  This spring the plants are looking good and the weeds are still absent.  Hopefully we'll get a bumper crop again :-)

February 18, 2013

2013 Seeds

This year we are sticking to the basics, as in heirloom.  I decided to purchase through Eden Brothers because they have a wide variety of seeds to choose from, including conventional, heirloom and organic.  We are also just doing the basics in terms of what we are growing.  Nothing fancy.  The stuff we always enjoy eating fresh and processing.  


Here is my order list:  
2    Corn Seeds - "Golden Beauty" - Ounce  SVCOR27-OZ  
1    Beet Seeds - "Detroit Dark Red" - PacketSVBET5-PKT  
1    Beet Seeds - "Crosby Egyptian" - PacketSVBET8-PKT   
2    Carrot Seeds (Organic) - "Danvers 126" - PacketSVCAR113 -qb1 
1    Cucumber Seeds - "Long Green Improved" - PacketSVCUC35-PKT 
3    Kale Seeds - "Premier" - Packet      SVKAL53-PKT    
1    Bean Seeds (Bush) - "Golden Wax" - OunceSVBEA4-OZ    
1    Bean Seeds (Bush) - "Landreth Stringless" - OunceSVBEA7-OZ    
2    Bean Seeds (Bush) - "Contender" - OunceSVBEA2-OZ   
1    Pea Seeds - "Sugar Snap" (Snap Pea) - OunceSVPEA92-OZ   
2    Pea Seeds - "Thomas Laxton" - Ounce  SVPEA86-OZ    
2    Pumpkin Seeds - "Small Sugar" - PacketSVPUM102-PKT   
2    Spinach Seeds - "Bloomsdale Long Standing" - PacketSVSPI112-PKT    
1    Squash (Summer) Seeds - "Golden Summer Crookneck" - PacketSVSQU119-PKT    
1    Squash (Summer) Seeds - "Black Beauty" - PacketSVSQU114-PKT 

I'll buy tomato and green pepper starts at Wilco.   And I'll get some basil once the weather gets warmer (the thyme and rosemary over wintered OK).  We also have blueberries, raspberries, strawberries and grapes in the garden.  Crossed fingers, we'll have a great harvest this year! 

October 3, 2012

Frost

What do you do to prepare for the first frost of the season?  It always happens where there is still fruit on the vine, literally.  And it usually sneaks up on me.  Like today, I was driving home from work listening to the radio.  They did their 30 second weather and traffic update and said "low-lying areas can expect frost early tomorrow morning."  What?!  Already?!  I'm so not ready!

So, I came home and asked Farmer Jeb and Jordan to help me out in the garden.  Jordan picked all the tomatoes with any pink or orange tint.  Then we put large black garbage bags over the remaining plants.  Finally, we picked all the ripe green peppers.


Now the counter is covered in bowls of tomatoes and green peppers.  I'll leave the tomatoes to ripen and then put them in the freezer as they do.  Waiting until the day we have enough to make sauce.  The green peppers I'll chop and freeze.

September 23, 2012

Where are the red tomatoes?!

Living the Pacific Northwest is awesome for many reasons.  Our weather is great.  When the rest of the country is under a heatwave that sticks around for weeks, we are enjoying 75 -80 F with a light breeze.  We get a few winter storms that close things down, particularly when an ice storms comes in.  But nothing lasts more than 3 days and then we are back to plain old rain.  We get no hurricanes or tornadoes.  Except for the  very real potential of a huge earthquake, this might be the safest place to live on the planet.

But our mild weather has a down side.  There just isn't enough heat every summer to ripen the tomatoes (or corn for that matter).

This summer has been lovely.  It was a slow start, as usual, but the garden came on strong and has produced very well this year.  The tomato plants were loaded with fruit.  But the heat didn't come.  Usually we get a week in August of 95 -100 F, followed by another week of 90 -95 F.  Those temperatures "finish off" the tomatoes.  Not this year.  We broke 95 F a few times, but nothing sustained.  And although September has been lovely with cool nights and days reaching 85 F, it's just not hot enough for the matters.

We try every trick in the book.  Quit watering them.  Poke a hole through the stem.  Put red colored plastic underneath.  Nope.  So yesterday we made the decision to start processing the green tomatoes.

Thankfully we found a wonderful recipe for dilled green tomatoes in the Ball Blue Book Guide to Preserving, 100th Anniversary Edition (2009).  The recipe can be found here.  We slice the tomatoes like sandwich pickles and the results are delicious!

Jeremy went down and picked the fruit from 3 of the 10 plants.  Just 3 and here is how much he got ....


Seriously!  I processed 20 pints and it only used 1/3 of that basket.  There is no way I need to keep making dilled green tomatoes.  Even if I gave a pint to each of my family and friends, we'd never get through all of the tomatoes on the plants this year.


I'm going to pull two of the remaining plants and hang them up-side-down in the barn.  And I'm going to take the remaining 2/3 of the basket Jeremy picked and wrap in newspaper.  Crossed fingers that those tricks might yield some red tomatoes.  Otherwise I'll have to do the worst thing - put the green ones in the compost :-(

August 31, 2012

Beets, Beets and More Beets

Wow, what a great beet crop this year!  I grew red, golden and candy stripped.  Today was round two of making sweet pickled beets.

The fruit

 Slicing is messy

 Really messy


Had my first broken jar today.  It's amazing that I've gone 7 years of canning without braking any.  Guess I packed it too high or maybe the jar was just weak.  Surprising to take the lid off the pot and see beets floating in the top.  And sad to have lost a jar of one of my favorites.  Oh well, these things happen.

March 24, 2012

Saving $ by Gardening?

I have always heard a lot of talk about how much money you can save by growing your own veggies. And I've always wondered about that. I think it's true if you grow enough and know how to preserve and store the food and have all the equipment to do both. (A pressure cooker is not cheap - luckily I inherited mine from my mom.) But otherwise, is it really a good way to save money?

One of my favorite books is "The $64 Tomato". It's a story about a man who wants to put in a kitchen garden. He and his wife go through some serious trials and spend quite a bit of money, but finally do get a great garden put in and growing. When all was said and done, he calculated out how much it cost to grow a single tomato in the first year and it was $64. Clearly that will do down because once he has the garden he will have it forever. But you get the point.

Another issue is space. We are fortunate enough to live out in the country and we have space to grow lots. Most people however live in town and have a small yard or in an apartment and have a balcony. In some neighborhoods there are community gardens where you can get a 8x6 ft plot. That's pretty small. How can that produce enough to save any money? Well, I just read an article that has changed my mind some.

The article talks
about the most profitable plants that you should grow if you plan on selling at a farmer's market. I don't sell at a farmer's market, I just grow for my family and friends. When I read this I thought "Wait! This is telling what plants I should grow myself so I don't have to spend all that money to buy them." The top of the list is cilantro. I love cilantro and use it a lot in cooking. And it is really expensive - especially if you buy organic. Guess who will be adding cilantro to the garden this year?!

Next on the list is arugula (a leaf green). I got that covered - literally. We have arugula growing in the cold frame right now along with other greens for salad. "Green salad mix" is number 3 on the list. Then are chives, dill, lettuce and cherry tomatoes.

The best part about these top six is that they are perfect for small spaces, raised beds and container gardening. My 8x4 foot planter box, which we put in for growing cold weather plants while the big garden sleeps through the winter, produces more greens than we can possibly eat. I end up giving the left overs to friends or tossing to the chickens. We also have a bunch of small containers (flower pots) that I plant with herbs, including chives which have recently re-sprouted. And a one cherry tomato plant will give you a bumper crop for late summer salads.

Cucumber, basil, radish and snow pea are in the articles top 20. These all do well in small spaces too. Cucumber and snow pea get trellised up so they take no space at all - the side of a house will work. Radish are the easiest thing to grow next to zucchini! Perfect for kids to start with. Basil, the best herb in my opinion, goes in a flower pot.

One surprise to me was that summer squash is in the top 20. Summer squash, if you don't know it by that name, are the small yellow squash sold right next to the zucchini. Summer squash are just as easy to grow as zucchini and there are dwarf versions available. I like to grill summer squash, zucchini and cherry tomatoes. You can also shredded summer squash and use in muffins and breads. Or freeze it and put in soups during the winter.

Some things on the list don't work for small spaces. Such as winter squash. I assume they aren't talking about little decorative pumpkins, but rather acorn and butternut squash. Not only do these take up a bit of space, they have really long growing seasons. We grow pie pumpkins (aka sugar pumpkins), which I bake, puree and freeze to use in muffins and breads. But I gave up on acorn and butternut - they just never matured.

So, maybe with some strategic thinking about what to grow, even a small space can actually save money. That is provided that you like cilantro, radishes, dill, chives and cherry tomatoes. Which I do!

February 8, 2012

Seed Order 2012

I just placed my seed order. I'm so excited I can hardly stand it. This year there will be a focus on trellises with an emphasis on beans, peas, small gourds and cucumbers. Below are the seeds I ordered from Territorial Seed Co. I left in the catalog numbers for those who order through Territorial Seed Co. and might be interested in these varieties.

SQ803/S Bush Baby Squash - small green zucchini
BN054/S California Blackeye 46 Bean - shelling bean
PE633/S Canoe Peas - shelling pea
CU322/S Diamant Cucumbers - pickling cucumber
CN204/S Earlivee Corn
BR108/L Fiesta Broccoli
SQ806/S Golden Rod Squash - yellow summer squash
PU719/S Neon Pumpkin - pie pumpkin
ON545/S Pacific Pearl Onion
MS493/L Perfection Fennel
CN223/S Precocious Corn
CU293/S Raider Cucumbers - slicing cucumbers
BT133/S Red Ace Beet
XP709/A Rio Grande Potatoes - russet
CF171/S Snow Crown Cauliflower
BN027/S Soleil Bean - yellow french bean
BN044/S Speedy Bean - green bean
GO339/S Spoon Platoon Gourds - ornamental gourds
PE634/P Sugar Sprint Peas - snap peas
BR103/S Veronica Broccoli
CR283/S Yaya Carrots
XP702/A Yukon Gold Potatoes

I'll also purchase starts (live plants) of Roma tomato, banana peppers and basil. Other herbs like rosemary, thyme and oregano I've over wintered. Spinach, romaine and kale are currently growing inside and in a cold frame. I've also got some sprouts started in the kitchen window.

Spring is in the air and seeds in the dirt. Yay!!

February 4, 2012

Tales from the Compost


Two winters ago I saw "biobags" at the store. Lauded as being a non-messy way to move your compost from the kitchen to the heap, I was intrigued. And the bags are biodegradable. Seemed like a great idea. I bought whole box full and used them for about three months. In the spring I moved compost heap onto the garden and found that the bags had not biodegraded. Worse, when Jeremy tried to till garden soil the pieces of bag got caught in the tiller blades. That was the end of using "biobags."

Fast-forward to today. We had about 2 feet of really great compost to move onto the garden. The compost consists of kitchen scraps, straw, chicken poo and lots and lots of sheep poo. After a couple hours of shoveling and dumping I got to the bottom and guess what I ran into. Yep, a few still-not-biodegraded "biobags." 2 years! Absolutely everything else in the compost heap was fully broken down into rich dark soil, even the straw. Stupid bags!

Also found in the compost heap while shoveling were bailing twine (I guess from the straw that got tossed in), rebar (I have no idea) and sticks (presumably from the trees above the compost). The best thing though were hundreds and hundreds of worms. Every shovel full move the little wrigglers to the garden. Woot!

Once the heap was completely moved and spread out onto the garden, I let the chickens go into the now-empty-compost and scavenge for worms. They were in heaven. The pictures if 5 of the 6 pecking away, which they continued to do for at least a half-hour. Every time I took out the camera the 6th chicken got shy and left the compost to hide out in the shrubs.


December 31, 2011

Lasagna

Not the kind you have for dinner. This is the kind that develops in the sheep stall as we put down a layer of straw then the sheep go to the bathroom on it and sleep on it and mat it down. So we put another layer of straw down, which they promptly soil up. And another layer of straw goes down. And so on and so on. Until we have a good straw-poo-pee lasagna built up. Next comes the difficult task of mucking the lasagna from the stall to the garden to feed all the worms and bacteria and get ready for plants in the spring. Today we did that lovely task.

Jeremy pitch-forking and shoveling. Me hauling and dumping in the garden and coming back for more. We had two wheelbarrows going so he was filling while I was running. It took roughly 2 1/2 hours to go from a foot thick of damp, stinky lasagna to find the dirt ground below. 61 wheelbarrow loads in total. Then another 1/2 hour to spread the goods out. It covered about 2/3's of the garden. The final 1/3 will get the compost put on it, but that will have to wait for another day when I am able to move my arms again.

I am proud that through this process, done every winter, we have grown the soil in the garden up by about 4 inches in the past 6 years. The results are easy to see when the soil is tilled up - dark, crumbly and full of worms. And we reap the benefits, literally, in the summer and fall as we harvest fruits and veggies.

For now though, I'm exhausted and dirty. I think I'll take a shower and nap. Here are before [Jeremy with his foot where the feed trough was partially buried] and after pictures of the stall, plus a picture of the lower 1/3 of the garden with mounds of lasagna waiting to be raked in.


December 19, 2011

And the List Gets Longer

Once canning season is over and the garden is cleaned up. Once the chickens stop laying so much and the lambs are sold. Once the days get very short and the temperatures cool. I loose all motivation to do anything, at all. This is the lost time. When we just make sure the animals have food and water and don't worry about other things that needs to be done. Lost time lasts through December. And it's pretty wonderful. We actually have time to do things like go for a walk or sew or knit.

But right about Christmas, just as December is coming to a close, we start to make a list. Not the "making a list and checking twice" kind of list. A all-the-things-that-have-to-get-done list. And it grows daily. Here is the list as of tonight:

1. Clean the chicken coop! Seriously it is getting gross and the poor chickens have to spend a lot of time in there with the cold and dark and rainy.

2. Rake the leaves. All the leaves came down in October and covered the ground. And there they have stayed. If we don't get them up soon the grasses underneath will start to die.

3. Clean out the sheep stall. The straw/poo lasagna is about one foot deep at this point. Getting it all shoveled out leads to ....

4. Put compost on garden. The sheep stall lasagna and all the goodies from the compost bin need to be layered onto the garden. The heat and nutrients will really get the bacteria and worms going.

5. Down a tree or two. We have a couple trees that have gotten big enough to really shade the garden. It's time for those to come down.

The best part of starting the list is that I'm really looking forward to it. My job is all computers and meetings and cubicals and elevators. I have to carve out time to move around. But starting after Christmas home is all about hard labor and using my body for what it was made to do - work, I'm mean really work.

December 10, 2011

Seed on the Brain

I know it's only December and it's freezing outside. I know I'm suppose to be relishing the down time of winter - not lambing, not planting, not harvesting, not canning. But I'm already thinking about next spring and what I want to plant in the garden.

Our garden is huge by many peoples standards, but it's still just a garden. We don't mass produce produce and sell it. We just try to grow enough to feed ourselves well and maybe have enough leftover to share with family and friends. And since we aren't as concerned with high yields as someone who is working the farmers markets we have the luxury of choosing varietals for taste rather than size.

Take for instance the strawberry. If you go to the store, not the farm stand or produce market but a regular chain grocery store, in the early spring you'll find strawberries. Or in reality a form of strawberry is huge, bright red and utterly tasteless. For some reason people loves these. I've been to many friends houses for a meal and they are all excited about the huge, red strawberries that arrived in May. I always smile and eat a few, but I'm think "Seriously?" In June, when strawberries are in season in the Pacific Northwest, there are bunch of varieties of strawberry! They are smaller, sometimes a lot smaller, and range in shades of red. But one of these little cuties packs a flavor punch that completely knocks out the store-bought mega berries. [The picture is of a little mini-strawberry that grows in our flower beds like a ground cover - I have no idea the variety, but they are delicious.]

I recently read an article about a study that looked at the nutrient content of veggies sixty years ago and veggies today. Guess what - not only have veggies been bread for high yields and gigantic size, but they also have been bread in a way that decreases the amount of key nutrients they provide. http://www.grist.org/food/2011-08-02-not-your-grandmas-strawberries. Yesterdays green been was way better for you than today's green bean.

So, here I am thinking about what I want to plant in the spring and I'm thinking I'm going to go with just heirlooms. In the past I have chosen varieties of some things, like butternut squash, that don't take so darn long to ripen. We just don't have the growing season available to wait one hundred days for a squash. Maybe I should honor that and not grow butternut squash. Just a few hours west, in mid-Washington, farmers are growing butternut squash and I can buy those at my corner market.

What I am going to do in my down time is some research. What are the best heirlooms for my region? What can I realistically grown in ninety days? Ninety days is about all we get of good sun and warm temperatures. What will pack the best flavor-punch and hopefully also be full of vitamins and minerals? If anyone out there has some suggestions, I'd love to hear them.

October 8, 2011

Apple Butter

We have an old apple tree in the pasture. We don't know what variety it is - it produces green and red apples with a tart flavor like a granny smith. Also, the tree produces huge amounts of fruit for two years in a row and then produces nothing the third year. The first time it didn't produce we thought maybe there was a late frost we didn't remember. But after the next time, we realized this is just how the tree cycles. This year was an on-year. We had tons of fruit.

Jeremy and I went down in the rain and picked all the apples. The tree is not very tall, but there is one branch that extends way up. Jeremy used the stirrup hoe to drop the apples down on the ground. This bruised them, but since we were just making apple butter, who cares. It was dangerous being in my shoes trying to grab the apples while others were falling from above. I got hit a few times on the head. But I survived.

Back inside, Jeremy cut the apples removing blemishes and the core. I boiled the apples until soft and then put through the food mill. With the massive amount of fruit, there were apples boiling, apples being processed and sauce cooking all at once. Unfortunately, some of the sauce got burned at one point because I didn't stir frequently enough. Finally we had all the fruit milled into our largest stock pot with a couple cups sugar and tablespoons of cinnamon - lots of taste testing and adjusting flavor to get it just right. Then came the cooking down and stirring, stirring, stirring. I came to understand why people use a huge copper pot with a paddle. My arm was dead tired when the butter was finally thick enough to start canning.

I think the most important thing when making apple butter it to make sure you get all the air bubbles out of the jars before you secure the lids. Apple butter is thick, not thin like apple sauce, so it's vital you get it really hot and don't have any pockets were bacteria can live. Then the hot jars go into the pressure cooker for 20 minutes at 10 lbs pressure.

End result - 25 pints of delicious apple butter. We've already finished one. I love to smear a thick layer on my toast. Jordan just likes to eat it with a spoon. It's also great on honey wheat crackers and zucchini muffins. Yum!

October 1, 2011

Processing Pumpkins 101


This morning I asked Jordan if she would come down to the garden and help me cut the pumpkins. A big smile came to her face and she said "Mmmm, pumpkin pie." Yep, it's fall.

Like everything else, except the rhubarb, we have a meager pumpkin crop this year - 6 total. All sugar pumpkins of course. We buy a couple of the gigantic jack-o-lantern pumpkins from the farmer's market to carve up for Halloween. I just can't bare to ruin perfectly good pumpkins we raise ourselves. Jordan and I gathered up what we have and brought them upstairs for processing.

For those who are unfamiliar with processing your own pumpkins and who would like to give it a try, here are the steps. Be warned that it takes the better part of an afternoon to do this, but home processed pumpkins are so far superior to store-bought-in-a-can it makes the effort and time completely worth it.

1. Wash 2-3 sugar pumpkins, however many will fit into a 9 x 13 glass baking dish.
2. Cut the stem down to 1/2 - 1 inch and pierce each squash in two places to let heat/steam escape from the middle while it cooks.
3. Place pumpkins in the baking dish and add about 2-3 cups water.
4. Place in 350 F oven, with the rack on the lowest level, and bake 1-2 hours.
5. When you can easily insert the knife and the skin is looking loose, they are finished - remove from oven and let cool. Cooling can take 30 plus minutes.
6. Once the squash is cool enough to work with, cut each in half.
7. Working with one halve at a time: scoop out the seeds and stringing innereds with spoon and discard (or save the seeds for roasting).
8. Slice each half into 2-inch-wide pieces.
9. With a paring knife, peel the rough skin off and discard.
10. Two options - one slice and pack into freezer containers OR
11. Slice, then puree and pack into freezer containers. If you don't puree now, you may have to puree later if you are using the pumpkins for pie or soup. Personally, I like option 1 and only puree what I have to later.
12. Label each container and freeze until ready to use. It will keep for about 6 months.

I make muffins, pies, soups, etc. with the processed pumpkins. You can use the same steps for butternut squash, acorn squash - any winter squash except spaghetti which is just too stringing. The other plus to processing your own pumpkins is that the whole house will smell delicious.

September 11, 2011

Pressure Cooking Tips


Canning from 2pm until ... well I'm still going so I'll have to get back to you on that. Carrots, beans and beets harvested, cleaned, peeled (just the carrots and beets), chopped, packed in jars and processed. Thank god my mom was here to help or I would have passed out in a pile of sweat in the middle of the kitchen. And how come canning day always falls on the hottest day of the summer?

But we are now ready to be snowed in with the power out - bring it on, we got enough food to eat like kings for a couple weeks.

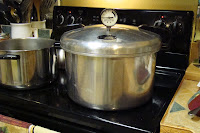
If you haven't processed food in a pressure cooker before but are pretty well versed in pickling and jamming, it is time to expand you repertoire. Pressure cooking is a great way to process lots and lots of fresh veggies. I have a huge pressure cooker and by October I will have processed enough food to last until next summer. Here are some tips if you decide to make the leap:

1. Always follow the manufacturer's instruction, word for word. Never ever look for ways to speed up the process. You'll end up ruining your equipment, injured or with contaminated food.

2. Always have lots of boiling water at the ready. Boil 16 cups of water in a big pot. Use a ladle to put boiling water over your veggies and then use a large measuring cup to put boiling water into the pressure cooker. While the cookers is doing its thing, add more water to the pot and bring to boil.

3. Run the rubber gasket under hot water to make it expand slightly before inserting it in the pressure cooker's lid and securing the lid to the cooker.

4. When the cooker is within 3 pounds of the desired pressure, turn the heat down to medium-low. If you wait until you hit the desired pressure before turning down the heat, the pressure will go over.

5. Leave one of our stove's burners open and off. When the times up, move the cooker to the open burner to cool. It will cool down faster than leaving it on the turned off, but still warm, burner.

6. When you are all done and ready to pack up, rub a little olive oil over the rubber gasket. This will keep the gasket from getting brittle. My gasket is nearly as old as I am - really, it is.

August 28, 2011

Storing Potatoes

It was about 8 years ago when I first grew potatoes. We had had a garden before that, but the garden consisted of four raised beds that provided only about 6 inches of head-space above near solid clay. Not exactly the best potato growing conditions. Then, when I was pregnant with Jordan, we moved into a newer house with a well groomed yard. And so that first summer I grew potatoes, as well as carrots, another veggies our previous garden boxes had not allowed for.

That fall we had a bumper crop of potatoes and I had no idea how to store them. Fortunately I worked with a guy who had been gardening for the past 20 years and knew everything there was to know about any manner of fruit or vegetable common to the Pacific Northwest. So I asked him in the lunch room how to store our potatoes. I followed his instructions to the "t" and ate delicious potatoes through March. We have been storing potatoes the same every since.

Here are the steps:
1. Dig your potatoes being careful not to slice them with the shovel. I usually dig from the edges and deeply to loosen the soil, then use my hands to find the potatoes. Any that you slice should be kept in the fridge and used first.
2. Brush as much dirt off as possible, but do not wash. Washing add moisture, which can cause mold.
3. Lay newspapers out, two thick, in the garage or basement - anywhere cool and dark. Spread the potatoes out so that they aren't touching. Leave to dry for a day.
4. Put one layer of potatoes in a brown paper bag. Make sure it's just one layer, don't stack them. Close and roll the top down so that it stays closed. Repeat.
5. Place bags side-by-side in a cool, dark, dry location. Make sure the bags are not sitting on concrete, which holds some moisture. Up on a shelf is better. And away from any potential mice - nasty little buggers!
6. When you open a bag, move any potatoes you don't eat into the fridge.

This year's potato crop is pretty small, but a far cry better than last year. Last year we lost all the potatoes, as well as the carrots and yellow beets, to voles. Not a single potato. This spring, I invested in these little sonic inserts that go in the ground and give off a sound that is suppose to repel voles and moles. It must have worked, because although there weren't many potatoes, all were intact.

August 24, 2011

Food Preservation Classes

I belong to a group at work called CityMamas. It's a bunch of ladies, all moms you may have guessed, who work for the City of Portland. We meet monthly and have discussions on topics like making kids internet safe and de-stressing our lives. Good stuff. A lot of our conversations revolve around food, primarily how in the heck to get healthy food into your kids when you have about 2.5 minutes of time available to make a meal. But we also talk about ways to eat locally and eat more fruits and vegetables, even in the winter when fresh foods are scarce. This is how myself and three other moms got asked to lead a conversation on food preservation. All three of us spend spring and summer weekends processing food. Squirling away for winter, if you will.

Our first presentation was last year, about this same time in August, to the CityMamas group. It was well received and this year we were asked by another group - The Green Team - if we would bring back the presentation for a larger group.

Today, myself and Courtney, gave our little chat. (The other two moms who contributed significantly to the presentation were unable to make it.) We covered freezing, jamming, pickling, dehydrating, smoking and pressure cooking in one hour. Wow, it makes my head spin. And actually we covered everything in about 45 minutes and had plenty of time for Q&A. Here is a link to the presentation if you want to see it https://docs.google.com/present/view?id=dc4fxhnd_18dng6pgdh&interval=10&autoStart=true

Good questions and our answers:
Q: How do you dry tomato seeds for planting next year.
A: Soak the seeds in water for a day or so to loosen the membranes. Then lay the seeds on a paper towel to dry completely. Put dry seeds in a plastic bag and store in fridge until next spring.

Q: What if you are watching how much salt you eat, but still want to pickle veggies.
A: Try sweet pickling. Sweet pickled beets and bread and butter pickles are wonderful and lower in salt. It's one of the great things about processing food at home - homemade canned goods almost always have less salt then store bought.

Q: How do you know if the jar is sealed?
A: The middle of the lid has a slightly raised area that is vacuumed down when sealed. If it is still raised after the jar is completely cooled, then it didn't seal. Put it in the fridge and eat it first.

Q: Pickled watermelon rinds? Really?
A: Absolutely!

August 15, 2011

Chicken Fried Rice

Let me start by stating that we did not raise the chicken meat. Why, you ask. Because I'm nervous about taking the plunge into fryers. It seems so intense; wham, bam and you're butchering. I think we're going to try a turkey first and see how that goes. So for the time being, I purchase chicken from Draper Farms who, lucky for me, distributes through my local produce and meat market. Draper Farms meat is all pasture raised and local - next best thing to doing it myself.

Tonight we made delicious chicken fried rice, one of my favorite dishes. This recipe is from Weight Watchers, so it's way less fattening and salt ridden than your standard restaurant variety. But don't be fooled - this isn't a cut the fat, cut the flavor recipe. This is a full bore meal that the whole family will eat for at least 2 nights - it makes 6 plus servings. Bonus - all the ingredients, except the chicken and the rice, are in my garden right now.

Chicken Fried Rice
1 1/2 c water
1 T butter
1 c dry rice
4 chicken breast halves, skin and bones removed
Cooking spray
3 eggs
2 medium carrots
3 garlic cloves
3 green onions
3 Tbls low sodium soy sauce
1 cup fresh shelled peas

Directions
Bring water to boil, add butter and rice. Cook over low until all the water is absorbed. Meanwhile, fire up the grill to medium-high heat and BBQ the chicken breasts until done through.

While the rice and chicken are cooking. Shred the carrots, chop the garlic and slice the onions, including the whites. Spray a large cast iron skillet with oil to coat the bottom of the pan and place on medium heat. Add 3 eggs and scramble while cooking until done. Put eggs on a separate plate. Spray the pan again and add carrots and garlic. Saute 5 minutes. Add onions and saute 3 minutes. Chop cooked chicken into bite-sized pieces. Add peas, rice and chicken to pan. Pour soy sauce over. Mix and heated through.

I like to serve this with roasted cauliflower, but I don't grow cauliflower and didn't have any tonight. If you do have cauliflower and want to cook some up here is what I do. Cut one head into bit-sized florets. Toss with olive oil and sprinkle with sea salt and ground cumin. Roast in oven at 400 F until fork tender.