Showing posts with label my mom. Show all posts

August 16, 2015

Apple Sauce

I talk to a lot of people who are nervous about preserving food.  It's understandable.  Can you say botulism?!  In reality, preserving food can be really easy.  In the past I've posted instructions for simple preservation, like freezing and making jams.  But a great beginner's step into food preservation is to make apple sauce.

It's mid August now and the apple harvest is just starting.  The early apples, like Romes, Cortland, Braeburn and Gravenstine, do not store well and are best eaten fresh or made into sauces, juice or pie filling.  To get your apples, I highly recommend going to a local farm and buying direct.  Not only will you get a great day out in the country and support local farmers, but you are more likely to get the apples you want.  Stores typically only carry the most popular apples and therefore have a small selection - you almost never see saucing apples at the store.  For the best apples sauce, pick a variety of apples. Get about 10-15 pounds.  These do not have to be pretty apples.  After all, you are just going to sauce them not display them.  Misshapen, water marks, a couple bruises are all OK.  (No worm holes though.)

You do need some basic equipment.  August is a good time to buy canning equipment.  Most stores, even Fred Meyers, have canning equipment on sale.  If you aren't ready to make an investment, ask around.  I bet you know someone who will loan you a few things for a day.  Here is what you need that you probably don't already have in your kitchen:

1) A food mill.  To make nice smooth sauce, like you buy it at the store, you need a food mill.  I also use this to make blueberry jam and cranberry sauce.  Yesterday I made plum sauce with it.


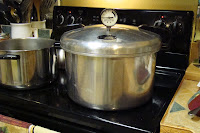
2) A very large, deep pot and two smaller stainless steel pots (one is pictured).  You will use the huge pot on the left to give your jars of sauce a "hot water bath".  That's the processing method.  You need a pot that will fit roughly 8 pint jars and that you can fill to 1-inch above the top of the jars with water - so pretty darn big.  The pot on the right is for making the sauce.  Don't use aluminum because it will discolor your sauce.  You need two because you boil the apples in one and then sauce in other.


3)  The thinging on the left is a jar extractor.  You use this for putting the hot jars into the boiling water and removing them after the hot water bath.  The funnel on the right is for putting the sauce into jars without spilling.  It's not necessary but very helpful.


4)  And you need jars, of course.  I use wide mouth pint jars.  


5)  You'll also need a big slotted spoon, a soup ladle, and a couple of clean kitchen towels.

The whole process will take 2-3 hours from start to finish.  There is some down time, but not much. 

Preparation.  Wash and dry everything, including the jars and lids.  If you have a sanitize setting on your dishwasher, use that to clean the jars and lids.  Keep the jars and lids hot.

Step 1 - Slice and core the apples.  Remove any major blemishes.  No need to peel.  No need to make them look good - just chop them up.  Place into the stainless steel pot, filled halfway with cold water and 2 table spoons lemon juice (to slow the browning process).  Keep going until the pot is full.  Place on stove and bring to boil, stirring occasionally to prevent apples from sticking to the bottom.

Step 2 - While the apples are coming to boil.  Fill the large pot with water to about halfway and put on stove.  Cover and bring to boil.  Since it's such a huge pot, it will take a while to boil.

Step 3 - When the apples are soft and starting to fall apart, move that pot off the stove, on to a folded up kitchen towl.  Set the second pot on the stove with the temperature off.

Step 4 - Place the food mill on the empty pot by hooking the two legs over the edge of the pot.  Use a large slotted spoon to scoop apples into the food mill until it's half full.  Twist the handle clockwise around and around.  Every so often go backwards (counter clockwise) to loosen up the apples and then go around and around again.  Keep going until all you have left are the peels.  It takes a while.  Dump the peels into the compost.  Scoop more apples in and do it again.  Keep going until all of the apples are through the mill.  Add some water as needed.

(If your hot water both is boiling, turn the heat down to medium to keep it hot.)

Step 5 - Taste your sauce.  It's hot so be careful.  Decide if you want to add sugar or cinnamon.  Add a little at a time.  I add 1/2 cup of sugar and 1/4 teaspoon of cinnamon, stir and taste again.  You can always add more, but if you add too much there is no going back.  You can add more of the water from the other pot if the sauce is thicker than you like.  Make it perfect for you.

(Let the liquid from the boiling cool and then pour into a pitcher.  Store in the fridge to have fresh apple juice for the next week.)

Step 6 - Start bringing the sauce back up to boiling.  You  need to stir constantly to prevent burning on the bottom.  Slowly increase the heat from low to medium to high.  Thick sauce doesn't boil like water.  It will create bubbles that can splatter.  As soon as I see bubbles, I turn down the heat to medium-low.

Step 7 - While your sauce is coming to boil you need to prep the jars.  Clean out your sink and fill with hot, hot, hot water.  Place the clean, sanitized jars and lids into the hot water.  Make sure everything is covered with water.  You want to be working with the hottest jars and lids possible.

(Turn up the heat on the hot water both, so it comes back to boil.)

Step 8 - Remove one jar from the hot water (use the jar extractor).  Place the funnel in and use a soup ladle to scoop sauce into the jar.  Fill leaving about 1 inch of headspace at the top.  Place the lid on and tighten.  I use a towel to hold the hot jar and tighten.  Use the jar extractor to put into the hot water bath.  Repeat with the next jar.  Keep going until the pot is full - usually about 8-9 jars.

Step 9 - Bring the hot water bath to boil.  When it's boiling, set the timer for 10 minutes.  Then use the jar extractor to move the sauce to a towel to cool.

Note - If you have more than 8 jars worth of sauce, you will have to make two batches.  While the first batch is processing, drain and re-fill the sink with hot, hot water.  Prep the next set of jars.  Keep the sauce at a very slow boil and stir occasionally.  When the first batch is done, repeat steps 8 and 9.  If you have just a little bit of sauce left - like one jar - skip the hot water bath.  Instead fill the jar, put on the lid and let it cool.  Then put in the fridge and eat within a week.

Step 10 - After all the jars are cooled to room temperature, check that each has sealed.  The center of the lids should be sucked down.  Gently push on each lid.  If there is no give, it's sealed.  If it pops down and back up, it didn't seal.  Sealed jars can be stored in the cupboard for up to a year.  Unsealed jars should be placed in the fridge and eaten within a week.  I stick a square of masking tape on the top of each jar and label it "2015 Apple Sauce."  If all you are making this year is apple sauce and you've never canned anything before, then you don't need to label.  But if you make lots of stuff you will forget what you have and when you made it.  I've dug into my pantry and found jars of stuff that are years old.  (Those go straight to the compost.)  And some things look a lot alike - plum sauce, cranberry sauce and pizza sauce look surprisingly similar but cranberry sauce on your pizza is no good at all.

That's it!

The picture below is me and my mom picking out apples in Hood River, OR.  We go to the Heirloom Apple Festival every year and get some awesome apple varieties.  My favorite are called Arkansas Black.  They have a thick skin and hearty flesh, so they store great!


October 23, 2011

The Best Soup

No, really, it is the best soup, ever! My mom came up with this soup and it was a staple of winter meals growing up. It's not only delicious, but full of vitamins and minerals to ward off colds and flu plus it's hearty enough that even my meat-and-potatoes hubby can eat it without a roll and feel full. We made our first batch of the season for Sunday night dinner and we had enough left over for Monday dinner and Tuesday lunch. Here is the recipe:

Corn Chowder Soup
Servings = 8-10
Time = 1 hour

Ingredients
6 thick-cut bacon strips
1 onion, chopped
2 cans corn, drained
2 T sugar
1 t salt
1/2 t fresh cracked pepper
2 T butter
1 c 2% milk, divided
2 T all purpose flour
2 can diced tomatoes, not drained
2 c red potatoes, chopped
2 c hot water

Directions
In a heavy duty skillet, cook bacon until crispy. Set on paper towel to cool. Pour out grease. Then cook onion in the skillet until softened.

While onion is cooking, in a large stock pot with a heavy bottom, add corn, sugar, salt, pepper, butter and 3/4 c milk. Bring to simmer. Whisk remaining 1/4 c milk with flour. Pour flour mix into corn and continue to cook, while stirring, until just thick. Remove from heat and add the cooked onion. Use an immersion blender to blend to desired consistency.

Add tomatoes, potatoes and hot water to the corn. Bring to simmer, stirring frequently, and cook until potatoes are tender. Break up the bacon into the soup. Stir and serve.

Notes - You can use whole milk to make the soup creamier, but you can't use 1% or skim milk because the fat-to-flour ratio will be off. You can use any type of potato as long as it is thinned skinned.

Hoodriver Apple Festival

Every fall we take trip out to Hoodriver for the Heirloom Apple Festival. It's one of my favorite things visiting all the orchards, even if I have no reason to buy apples.

The first stop is always the Apple Valley Store. This old store not only has some of the best jams and jellies I've ever sampled, they make a pear pastry that is worth the drive. It's a whole pear, cored and wrapped in pie crust then baked. After the pear is soft and the crust golden, they drizzle it with a butter, cinnamon and sugar sauce. It's a meal all by itself, but since the store also has a killer BBQ with cabage/pear slaw, I leave stuffed. This year, my mom and I split the BBQ.

The next stop is Cody Farms. The farm is owned and operated by a group of women who are all on-hand slicing apples and pears for tasting. They also crush apples for fresh cider and give kids hay rides around the orchard. And as if I haven't had enough to eat, they have amazing pies-by-the-slice.

After Cody Farms we go to Rasmasson's. This is your classic fall farm completed with huge pumpkin patch and corn maze. They also have an amazing variety of apples. Spitzenburg, Winesap, Newton-Pippen, Arkansas Black - the best apples that you never see in the store. And as if I haven't had enough to eat, they have caramelled apples. I like to get the caramelled apple first and then head into the corn maze.

Finally it's up to Parker's Fruit Stand because they have the best cookies in the valley. Yep, that's right, I eat a cookie too. What a great way to end a great day touring orchards.

September 17, 2011

Last Supper

It's that time of year - time to butcher the pigs. It's bitter sweet. Bitter - I really like these pigs. They are funny and nice and really personable. Sweet - Bacon, need I say more. Last night they got a real last super, courtesy of my mom who always saves her compost in the freezer at her condo and brings out treats for the pigs and chickens.


September 11, 2011

Pressure Cooking Tips


Canning from 2pm until ... well I'm still going so I'll have to get back to you on that. Carrots, beans and beets harvested, cleaned, peeled (just the carrots and beets), chopped, packed in jars and processed. Thank god my mom was here to help or I would have passed out in a pile of sweat in the middle of the kitchen. And how come canning day always falls on the hottest day of the summer?

But we are now ready to be snowed in with the power out - bring it on, we got enough food to eat like kings for a couple weeks.

If you haven't processed food in a pressure cooker before but are pretty well versed in pickling and jamming, it is time to expand you repertoire. Pressure cooking is a great way to process lots and lots of fresh veggies. I have a huge pressure cooker and by October I will have processed enough food to last until next summer. Here are some tips if you decide to make the leap:

1. Always follow the manufacturer's instruction, word for word. Never ever look for ways to speed up the process. You'll end up ruining your equipment, injured or with contaminated food.

2. Always have lots of boiling water at the ready. Boil 16 cups of water in a big pot. Use a ladle to put boiling water over your veggies and then use a large measuring cup to put boiling water into the pressure cooker. While the cookers is doing its thing, add more water to the pot and bring to boil.

3. Run the rubber gasket under hot water to make it expand slightly before inserting it in the pressure cooker's lid and securing the lid to the cooker.

4. When the cooker is within 3 pounds of the desired pressure, turn the heat down to medium-low. If you wait until you hit the desired pressure before turning down the heat, the pressure will go over.

5. Leave one of our stove's burners open and off. When the times up, move the cooker to the open burner to cool. It will cool down faster than leaving it on the turned off, but still warm, burner.

6. When you are all done and ready to pack up, rub a little olive oil over the rubber gasket. This will keep the gasket from getting brittle. My gasket is nearly as old as I am - really, it is.

August 1, 2011

On Vacation

This post is not about farming, other than to say what a wonderful farm-sitter we have (thank you Desiree!). This post is about where we went on vacation - Bead Lake, WA.

In 1980, when I was 4 years old, Mt. St. Helens erupted and sent a cloud of ash around the world. We were living in Spokane at the time and all I remember of that awesome event was in the middle of the afternoon the ash rained down and it became dark as night. For the next few days no one could go outside without a special mask to prevent ash from getting into your lungs. Imagine my poor parents with a 4 year old and 1 year old stuck in a suburban house, with no cable! When the ash finally cleared and we were allowed back outside, my parents decided we wouldn't stop at the front yard. Instead they grabbed a map and chose a location about 1 hour north of Spokane - Bead Lake.

There are at least a hundred lakes within a couple hours drive of Spokane, so I'm not sure how they decided on Bead Lake, other than it is pretty remote for being so close to a largish city. I don't remember anything from that particular trip, but the lake made an impression on my parents and, being that there wasn't any property on the lake for sale, they decided to purchase 10 acres and a small, rustic cabin just north of the lake. This became known as the "hunting cabin," because my dad hunted white tail deer from that base camp for the next dozen years. (Picture of the "hunting cabin", 20 years after it was sold to another family. It's now in significant disrepair.) From the hunting cabin we had ready access to Bead Lake.

A quick story about the hunting cabin, before I launch into the lake. My first independent outdoor adventure happened at the hunting cabin. One afternoon I headed out on my own, as I did frequently because I've never had much fear of anything. I must have been about 8 at the time. I crossed the marsh on our property and began to move through the brush and trees. After a few minutes I looked around and had no idea which way I came from or how to get out. I heard my Dad's advice in the back of my mind, "If you get lost, stay put. It's hard to find you if you are moving." So I chose a nice looking tree and sat down. Not much after I heard my Dad calling for me and followed his voice out. I still never pass up an opportunity to bush-whack my own trail.

Ok, back to Bead Lake. It is amazing. It's a glacier-formed lake with very steep, nearly unbuildable slopes around 80% of the shore. The edge where the glacier receded and dropped lots of rocky sediment is the edge with cabins (as seen the in picture, cabins along the right). The steep slope, and the fact that it's National Forest, means that the lake will never be over-built and most of the land will remain wild. Wild, as in deer, elk, cougar, bear, turkey and the return of wolves, yes wolves! The lack of cabins and septic systems also means the water in the lake is very clean, drinkable, although my mom won't and would never let us kids drink it. The water is also clear - on a bad day you can see down about 15 feet; on a good day at least 30 ft. Add to that amazing fishing for Kokanee (landlocked salmon), Lingcod (landlocked cod) and Mackinaw, and this lake is a destination for all kinds of outdoors people.

When I was 4 to 9 years old, the weekend ritual was to hitch up the boat, drive up the hunting cabin on Friday night, stopping at the spring for water (no running water or electricity at the hunting cabin) and make dinner on a camp stove. The next morning we would get up early and head to Crystal Shores, Bead Lake's then boat launch, convenience store and campsite. We would try to get there before the crowds so that we could jet across to the beach - actually just a flat spot with small, well weather rocks - and set up before anyone else could get to that one non-steep location. We nearly always won the race and so we dubbed it "Correll Beach". My memories of days on the beach are as thick as the mosquitoes got in the evening. Learning to skip rocks (a skill I'm still trying to master), trying to catch fish in a plastic bucket, finding crawdads under sunken logs.

Then there was the day I got heat exhaustion. Needless to say, it was a hot day and the beach as south facing, getting a full day of sunshine. I was busy being a kid and refusing to stop to lotion-up or eat or drink. In the afternoon it hit hard, like a flu bug. I was burning up. My parents took the canvas top off the boat and made an umbrella of sorts for me to lay under. The only liquid we had left, other than the lake, was pineapple juice. I downed nearly a gallon (or so it seemed). By the time we got back to the hunting cabin and cool of the forest, I was well again.

Another significant memory was learning to water ski. My dad took two kids skies and screwed them together with wood so it was like skiing on one wide plank. I learned by floating in the water just off Correll Beach, holding the rope and my mom holding me by the back of my life jacket. Dad would slowly speed up until my mom let go and I stood up. I think I was 8 years old, but that's fuzzier in my memory than the feeling of the first time I got up and went around the lake.

For years my parents watched for cabins to be put up for sale around the lake. Not much was available. Many people keep cabins in the family. There are names, like Mead and Andrews, that go back more than 50 years. Finally, when I was 9 years old, the lake cabin, as it would come to be called, came up for sale. It was old and the stairs and deck were falling apart. The whole thing was leaning slightly. But it had a lot of waterfront and the price was good. My parents made their move. (Picture is of the lake cabin today, many repairs and a new second/lower floor later.)

When I was about 12 or 13, the operator of Crystal Shores, Pete, died of a heart attack. I had known Pete my whole life, it seemed. He ran the little convenience store with candy that my brother and I would purchase - usually year-old gummy worms. Loosing Petet put an end to Crystal Shores, which was divided and sold to three families, who all built huge cabins. These were the first really big, really nice, new cabins on the lake. This event marked a change. Since then property values have gone up steadily, so have taxes. One by one, the older smaller cabins are being tore down and new, mammoth cabins built.

Today there is a little public boat launch, run by the forest service, at the far east end of the lake. The launch has no dock and is only used by fishermen or kayakers. Correll Beach is still there, but we seldom see anyone at it. The people we bought the lake cabin from, now own the one next door to us. (We sold the hunting cabin 20 years ago.) There is a trail and two campsite that people frequently hike to. But the lake remains the same beautiful, clean, wild place it ever was. My parents are able to visit it often, but Jeremy, Jordan and I only get there once a year for a week long vacation. Still every time I smell the air the feeling of childhood comes over me and I smile. And now Jordan is getting to experience all the same places and activities I did - literally retracing my footsteps, hopefully not the heat exhaustion step though.

July 18, 2011

Arbor

This year's garden improvements have been focussed on preventing competition. We chose the some of the larger competitors - moles/voles, birds and deer. That is about 0.5% of the total competition for the garden harvests. But we figure slow and steady will win the race for food. Right?

I already posted about our creative use of leftover PVC to create the strawberry cover. Within about 2 hours a robin was caught inside the net. I had to open one end and then spook it to the opening. Thankfully no other birds have been able to penetrate the net. As a result we have harvested about 2/3 of the crop. Slugs, ants and mold have taken the remaining 1/3. I'm open to suggestions on those three - non-chemical suggestions. (Note - our slugs seem to be too smart for the beer trick.)

We have an interim measure in place for the moles/voles. I found these nifty little ground inserts that emit a noise that repels, in theory the rodents. Every 15 seconds or so a loud buzzing sound is produced. The box claims the sound travels up to 90 feet. I put one at every corner of the garden in an attempt to create a solid barrier. So far only a few moles holes have turned up in the garden. Maybe we have some really speedy moles that pass the barrier during the 14 seconds of silence and then get trapped inside? It's hard to tell about the voles since they don't great mounds. Once the potatoes, carrots and beets start forming, it will be obvious. Last year voles ate all the golden beets.

The second step on the moles/voles will be to create a 2-foot-deep trench around the garden and add chicken wire underground. Let's see 'em get through that! But it will have to wait until next summer after we add the last garden extension (which will be occupied by another row of strawberries).

The last defensive maneuver of this season was to build and arbor of sorts over the blueberries and raspberries. Jeremy and my dad built 6, 10-foot wooden T's. They dug down 3 feet, placed the T's in and pounded dirt down around. Then my mom and I moved the netting off the strawberries (they only have a few berries left to ripen) and onto the T's. Two things I learned during this process. One, netting really messes with your depth of field. Two, even humans can get stuck in netting. Twice I got good and caught up. My mom had to help extract me. Now I know how that robin felt.


June 21, 2011

Old Time Recipes

It is amazing the wealth of new, exciting information I come across daily. I'm literally bombarded with information. From news papers to blog updates to the new Time Magazine app for my smart phone. One of my favorite topics to pepper my brain with is food. Food in all forms - growing it, shopping for it (is there a farmer's market between my office and my home) and of course cooking it. I read cooking magazines like other people read novels. I have a book case devoted to food.

I blame my mom for this. Growing up, she was always clipping recipes from Sunset or Better Homes and Gardens and trying new dishes on us. She was, and still is, a superb cook. But the other day she said to me "You know, I have recipes older than you that I never tried." Better get cooking!

Tonight Jordan and I were sitting at Burgerville enjoying some fast food. (Yep, even a devote cook-your-own meals person like me has to hit the burger joint every once in a while.) Next to us was a man with his three daughters talking to an older, grandmotherly-looking, woman that seemed to be of no relation. Naturally I listened in on their conversation. They were talking gardening and the seeds that the man's girls had planted in the garden. The youngest, who was about 5, said that she planted the squash. The woman asked if they were pumpkin seeds. The girls said no, zucchini. The women turned to the man and ask if he'd every eaten the blossoms. He replied "My grandma use to fry them up for us. She dipped them in some batter and just fry them right up. It was so good. I wish I had that recipe."

This got me thinking about all the recipes that my grandma and great grandma made back in the day, before Food Network. A few of their recipes have been handed down to me. My Grandma Charlotte's potato rolls and my Great Grandma Vashi's candied yams, which are a must for Thanksgiving dinner. But there are those dishes that we talk about and always end with "I wish I had that recipe." Like pickled watermelon rinds. Not a summer goes by my parents don't reminisce about pickled watermelon on a hot afternoon, yet no one has the recipe. (Picture - Four generations: Grandma Charlotte, me, my Mom and Jordan)

I've decided that this summer's mission, should I chose to follow through, will be to hunt down old-time recipes. Primarily, those that my family use to make, but also from other families. I'm sure it won't take much to get my friends talking about what their mom, grandma, great grandma use to make for them. To start me off, here is a recipe for fried squash blossoms. As soon as my zucchini start blossoming, I'm going to make these and let you know how they turn out.

Fried Squash Blossoms
1 dozen squash blossoms
Vegetable oil
2/3 cup flour
1/2 c water
1/2 c milk
salt, mint, dill or other herbs

Directions
Wash blossoms in cold water and gently pat dry. Trim, leaving about 1 inch of stem on each. Fill a frying pan with oil to 3/4 inch deep and place over medium heat. Whisk together flour, water and milk until it is the consistency of sour cream - adjust flour or water if need. Dip a blossom into the batter and carefully place in hot oil. (Suggestion - wear gloves because the oil will splatter.) Turn blossom when golden brown. Work with as many as you can, turning until each is brown on all sides. Lay on a paper towel to drain. Sprinkle with salt and other seasonings.

June 5, 2011

Strawberry Improvements

It started a few years back, when my Mom brought strawberry starts from her house in Spokane, WA to our farm. We made a small patch in the upper corner of the garden and planted the berries. For the past four years the garden has grown by about 5ft each year and the strawberries have expended to fill much of that space. However, we didn't keep them in rows and the result was that last summer we couldn't reach more than half of the berries. Those that didn't mold were eaten by the birds. Time to create some rows.

The first two were immediately adjacent to the original patch. For the final two rows we would have to expand the garden one last time. We used the "lasagna gardening" technique (there is a past with the same name if you want to learn more) because there is no need to kill or till under the grass, you just work on top. It was relatively easy and created a beautiful rich, fluffy soil ready to be planted. As of this spring, we have 4 rows of strawberries each roughly 50 feet long. And I can walk between the rows to harvest. If I can get out there before the birds eat everything.

The other not-well-thought-out thing we did was to place netting over the original patch. I know that sounds like exactly what you should do but the problem was that we stakes which stood about 2 feet above the ground. The result was that the plants would grow through the netting. And it was a pain to try and move back to harvest underneath. My Mom saw in a magaz
ine, or maybe in the newspaper I forget, a way to use PVC piping to create nice arches to set the netting over. Luckily the previous owners of our farm had assembled a haphazard irrigation system along the driveway that we have never used. But the PVC has stayed in place, above ground hidden by grass and rose bushes that never actually need to be watered.


My Dad volunteered to cut the piping and dig the holes. He found some large piping in the barn that the smaller irrigation pipes could slide into and starting hacking. Then he got to dig 18 deep holes. After the first row he said "I forgot how hard it is to dig holes." When he was in high school he took a summer job on a ranch running fence. He thought it would be a great adventure riding horse, sleep out in a tent, mending fences. In reality is was hot, dusty work that consisted primarily of digging holes to set fence posts. Of course when he got back to school in the fall he told all his friends that he got to "be a cowboy" for the summer.


My Mom and my job was to put the larger pipes in the wholes and fill
around with dirt. We used a 2x4 to thump the dirt down and make sure each would provide a secure anchor for the arch. Then we set the arches. Lastly we spread the netting over. My Mom said "You know. If you got down on your hands and knees you could crawl through to pick berries and never have to pull the netting back." I had a better idea "You could lay on one of those auto mechanic's carts and just roll through." Both ideas made for a really nice visual. In reality I think we'll just lift up the netting.

At the end of the day, looking down from the back deck while BBQing hamburgers, it garden was starting to look like we actually know what we are doing.


May 15, 2011

Granola Bars

It takes so much time to make food from scratch. I mean, a whole lotta time! Between work, swim class, homework and family time, when exactly are we to cook? It's really no surprise that no one takes the time to make things like crackers that you can just pick up at the store. There are so many options for convenience food to choose from - flavors, textures, colors. However, I do choose to make some things, like bread, from scratch.

Jordan is a huge fan of granola bars. She eats 2-3 a day. At that rate, I want to make sure she's not eating a candy bar disguised as something "healthy". By disguised, I mean when the box says "Multi-Grain", or something like that, and the bar is coated in chocolate. So, when my Mom brought over a recipe from Sunset Magazine for no-bake granola bars, I was delighted. Jordan and I made some the next day - WOW, so good and easy!

No-Bake Granola Bars
Servings = 12 bars

Ingredients
1/3 c roasted, unsalted almonds
1/3 c roasted, unsalted sunflower seeds
2 c rolled oats
1 c chopped dates
1/2 t cinnamon
dash salt
1/2 c raisins, currants, dried cranberries or any other dried fruit
2/3 c honey

Directions
In a food processor, pulse the nuts and seeds until broken up. In a large bowl, mix nuts, seeds, oats, dates, cinnamon, salt and dried fruit. Heat honey in the microwave for 30 seconds. Pour honey over oats and mix. Cover a cookie sheet with parchment paper or foil. Dampen your fingers with water. Scoop oat mixture onto cookie sheet. Press into an 8 by 12 inch rectangle, dampening your fingers if the mix starts to stick. Put in freezer for 20 minutes. Cut into 12 bars. Individually wrap with plastic wrap. Store in fridge for up to 2 weeks.

Notes: You can substitute any roasted, unsalted nuts and seeds. Try pecans and pumpkin seeds.

Late Garden

There are two rules of thumb around here when it comes to the optimal time to plant the garden:

1. Get the garden planted no later than Mother's Day.
2. Don't plant until the snow is gone off the foothills.

The first rule is based on our short-ish growing season; mid May to mid September. Vegetables that take a long while to mature - corn, pumpkin, carrots, butternut squash - need to be started as soon as is possible or they won't have time to ripen in the fall. The second rule is simply based on temperature. If the foothills still have snow, then the soil in the garden is probably not warm enough for seeds to germinate. Of course, having a soil thermometer is a more precise way to go.

Most years, these rules can easily be followed because by Mother's Day the snow in the foothills has all melted away. Our tradition has been to have my parents and Jeremy's parents over for Mother's Day brunch and then my mom and I toil in the garden. But this year on Mothe
r's Day there was still snow in them-there-hills. On top of that, it was a cold and rainy day. We opted for brunch at my parent's condo instead.

All last week I watched the weather report hoping for a couple warm days to melt the snow and for one weekend day without rain. We got it! Wednesday, Thursday and Friday of last week were partly sunny with temperatures in the mid to upper 60's. Saturday was suppose to be cloudy but the rain was to hold off until the late afternoon. So I called my mom and said "Let's do this!"

Planting the garden takes 2 people roughly 4-5 hours of solid work. Mom and I have done it many times and have a system. The night before or morning of I draw a diagram of the garden deciding where to put things so that no variety is in the same spot as the year before (it's best for soil). When we get down to the garden and have all our equipment, seeds and starts out, we use the diagram to make walking trails around the different planting areas. Then we each choose a location and start planting. Mom usually starts with the tomatoes and I start with the pole beans. We just work our way through until it's all in.

Yesterday we got a late start because my parents had bridge lessons in the morning. Around 1pm we were ready to go and the clouds were moving in. As we planted the air kept getting colder and the clouds darker. We moved extra quick. At 4pm I felt a few raindrops. We hadn't gotten it all in. More than 3/4's was finished but the beets, carrots, onion sets and bush beans were still in their packets. But we could tell by the color of the clouds and the wind that the rain was going to really come down. So we packed up all the equipment and called it a day. If we get a break in the rain next week, I'll try to get some stuff in. Or maybe next weekend.

It should be noted that there is still snow in the foothills. Oh well, rules are meant to be broken.

May 10, 2011

A Little Success

I'm holed-up with the flu. I came down with it yesterday at work. The day started OK, but my throat was scratchy and annoying. I should have known something was wrong, but I ignored it and kept working. On the walk from my office to car to go home the fever hit, followed by shakes that made driving in rush-hour traffic a bit nerve wracking. By the time I got Jordan from after-school-care the aches had set in. Once we got home, I changed into my most comfortable jammies and I laid on the couch all evening letting Jeremy and Jordan take care of me.

This morning I was better, but not by much. So I called in sick to work, slowly gathered a blanket, tea and the book I'm reading and settled back into the couch. I napped most of the day. Then around 3:30pm there was a knock on the door. My parents had come over to check on the bees. Last Sunday, on Mother's Day, they had said they were going to come to check on the bees, but my flu-stupor made me forget. They, in turn, were not expecting me to be home and were surprised to see my Pacifica in the driveway. After learning I was sick, Mom decided not to come into the house - smart, the air was probably thick with flu bugs. Dad ventured in but only long enough to make some sugar water and I think he held is breath. Since the sun had come out, I decided I could use some fresh air and headed down to the hive with them.

The first step to checking on the bees, is to get all the equipment out and ready. It took some serious effort to get the smoker started because the newspaper and kindling that we keep in the barn were damp-ish due to the persistent, misty rain that only cleared today. I sat on the old railroad beams, covered in moss because my legs felt weak and was of no help at all. Finally the fire took and we walked over to the hive.

Dad pumped a little smoke in through the entrance and then propped up one edge of the top and pumped in a bit more. Then he removed the top and took out the frame feeder. We have been keeping the frame feeder full of sugar water since bringing the bees home. In a normal year, we probably could have stopped supplementing their food by now, but it has been so cold and rainy that all the flowers, and our orchard, are at least one month behind. We have also put a pollen cake in the hive every other week. There was no sign of the last pollen cake and the frame feeder was nearly empty. As Dad filled it I peaked in between the frames. The bees had drawn out comb on all by the most-outer-edge frames.

For those who are not bee keepers -- The frames are a sheet of grooved plastic in a wooden frame. The bees build comb off the plastic; this is called "drawing out" comb. In the middle most drawn out frames, the queen starts to lay eggs. In the outer most drawn out frames, the bees make honey. We decided to pull one of the frames to see how it looks. Honey! They are already making honey! I can almost taste it!

Since all looked great we put the frame and full frame feeder back in. Mom laid a new pollen cake on the top of the frames and we shut up the hive.

So if not for the flu, I would have been at work and missed the hive opening.

April 21, 2011

Pigs Like Carrots

You may think, well duh! Don't pigs like everything?! They are walking garbage disposals, aren't they? Actually, the first couple of pigs we raised not only weren't big fans of carrots, they actually hated the carrots enough to leave the peelings behind in the slop trough.

Those first two pigs were named Porky and Sammy. They were great animals. Friendly and funny and energetic. Porky and Sammy loved pastries and melon rinds. My mom would save melon rinds in the freezers all week long to have treats to bring the pigs on Sunday. I would visit the "day old" bread shelf at the store and bring home cinnamon raisin bagels ($1 per 1/2 doz). Porky and Sammy would get down right giddy at the sight of me or my mom coming toward the pole barn.

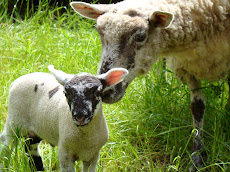
Our new pigs are named ... Porky and Sammy 2. Very original, I know. We decided that Porky 2 is the boy because he is bigger. He is also brave and friendly. Sammy is a girl, smaller and pretty leery of us still. I'm hoping she'll come around. They are only 3 months old, so we aren't slopping them yet. We probably could, but I'm worried the rich foods would make their tummies upset. But Jordan wanted to start feeding them stuff other than the pig feed. I suggested she bring down a few baby carrots to try.

Porky 2 and Sammy 2 don't know their stall and run that well yet. They are smart though. The feed system is a metal container that they have to lift with a nose to get at the food. They had that figured out in about 5 minutes. They also found the water fountain. But the trough, thus far, has just been something to climb on. When Jordan put a few baby carrots in it they didn't react much. Then Porky, being braver, came over to check things out. One bite and he knew - this is a good, good thing! The snorting began and the baby carrots disappeared quickly. Sammy was slow to catch on and only managed to get a few carrots before they were all gone.

The next night when we came down, they ran over to the trough - smart little piggies. Jordan put in more carrots. Those were gone in seconds. (I must note that pigs wag their tails when happy and those tails were a-waggin'). Tonight I had left over pineapple upside-down cake from last weekend's in-law Easter party. I have no idea if pigs can eat pineapple. I know that tomatoes make them sick, so maybe pineapple, being very acidic, may not be OK. I tossed the pineapples to the chickens (who really are garbage disposals) and gave the remaining cake to the pigs. The reaction was priceless.

Both got completely in the trough to get a better angle on the cake. Snort, snort, snort - tails going crazy. As the cake disappeared, Porky 2 started to throw his weight around and push Sammy 2 out of the way. In less than 5 minutes the leftover cake was gone. They actually licked the trough. Too cute.

The video below is not of the cake-eating (I wish I had taped it, but didn't think to bring the camera down.) In the video my dad is off camera whistling at the pigs. Porky 2 is keenly interested in the whistling.


April 7, 2011

A Bee Story

This might take a little while to tell, so I'll give away the ending right now... We got new honey bees and successfully moved them in to their home! Ok, now the long version -

Last year, in April, we got a box-o-bees. It was a cold, rainy day when we put them in the hive and it didn't get warm for many days after that. Not knowing much about raising bees in the Pacific Northwest, we had purchased a top feeder. It's a tray that fits over the top of the hive; you fill it with sugar water. But it was so cold that the bees never came up the top to feed. They all died.

We purchased a second round of bees. This time we went with a nuc. A nuc is a small, 5 frame, hive that you put simply into the big hive. It was much easier. Also, it was one month later and warm. The bees did great all summer long. They brought the comb out, filled cells with honey and raised lots of little bees. Then in the fall, the weather got cold and rainy. One day we came down to check on the bees and they were all dead. They hadn't left the hive. There was no sign of disease, mites, fungus - nothing. Just thousands of dead bees. It sucked! Sad and discouraged we put the hive and equipment went in the barn for the winter.

So here we are one April later and ready to make another attempt at raising honey bees. The first decision was to change hive's location. Jeremy and my Dad chose a spot near the barn and across the creek that gets direct sun from about noon until 3pm, the rest of the time there is dappled shade. The second decision was to use the frame feeder. Basically, it's a hollow, narrow plastic rectangle that sits down in the hive. The bees therefore don't have to come up the the top to eat. Third, my Dad decided to use a solid base, instead of a screen base, for the hive. This would mean the bees could work less hard to warm the hive.

The bees were set to arrive a week ago - the first weekend of April. However, the unseasonably cold weather in northern California made it impossible for the bees to be brought up. Then this week has been Jordan's spring break and she and headed to the cabin. Ruhl (the honey bee supply store) called to say that the bees would arrive on Thursday and must be picked up by Friday afternoon. Meaning me and my Mom would have to take care of the bees alone.

I got a little panic-y. It's not that I'm that afraid of bees - although being afraid of bees is the most common fear besides public speaking and spiders. But the process of putting them in the hive last year was a little nerve wracking. Bottom line, you have to shake the bees from the box into the hive. And I'm talking about 10,000 bees. Shaking the crap out of thousands of bees it's my idea of a good time. So, I started making inquiries about getting some help. I contacted the Clark County Beekeepers Association and Urban Growth Bounty, from whom we took a class about honey bees. My request was - Could someone please come help me! Desperate I know, but I was desperate. I got speedy and multiple responses. The association sent me some videos and advice. The links to the videos are below. The advice was to calm down. Literally. Everyone who got back to me said that this was simple and I could do it. I did get a few potential takers to come help. But my pride kicked in and I decided that me and my Mom could totally handle this!

Mom and I made the drive to Ruhl in Gladstone, OR on Friday. It was a glorious morning - sunny and warm (well, warm for April in the Pacific Northwest). We picked up our bees. Truly amazing that ten thousand bees can fit in a 18" by 10" by 4" box. After arriving home and having some lunch, we headed down the hive and got to work!

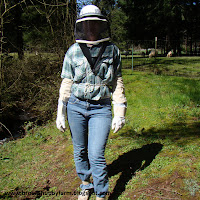
First we got everything out and put on the regalia. Some sexy outfits for sure! Then we read, re-read and re-read the instructions Ruhl sent with the box. In watching the videos, we learned that shaking the bees out is not necessary. Whew! So ... 1) remove five frames. 2) fill the feeder and put in the place of one of the frames. 3) remove the can of sugar water from the box-o-bees and quickly pull the queen out and put the can back in. 4) secure the queen to a frame, using a rubber band (genius). 5) put the queen/frame back in the hive. 6) remove the can of sugar water and put the whole box in the hive. 7) close it all up. No problem! We didn't even get stung.

All done now. The bees were out flying today, making big circles checking out the territory. Crossed fingers that they will survive and make it through the summer, fall and winter. Next spring, with any luck, the hive will be thriving and
we'll have some extra honey to partake in.

The videos about getting bees installed and feeding them:

April 4, 2011

Lasagna Gardening

Last fall we extended the garden by about six feet and using a newly acquired technique called "lasagna gardening." It's a no-dig, no-till, simple way to create a garden or, in my case, make one bigger. If you are asking yourself, what the heck is lasagna gardening, here's what you do:

1. Pick a location with good sunshine. It doesn't matter if the area is covered in grass or bark dust or weeds or whatever. Just make sure you like this area for a new garden. We did ours right over turf grass. No tilling. For more information on picking a location and sizing, check out the page "For Beginner Gardeners" - link to the left.

2. Put a weed-barrier down. We used cardboard, broken down boxes, and newspaper (for the newspaper use about 10 sheets thick to stop weeds from penetrating). If you are starting in a really weedy area, I'd recommend linen (fabric). Overlap the edges a bit to make sure there aren't any places where the grass or weeds will get loose.

3. According to the official lasagna gardening steps we learned in class, the next layer should be of twigs or pine cones or dried leaves - something pithy that will take a long while to break down. We skipped that step because we had already burned for the fall and because our compost is about 50% straw. But I think the woody layer is important for drainage, so I'd recommend not skipping it.

4. Pile on the compost. We are lucky enough to have a lot (and I mean A LOT) of compost. But if you don't .... If you are starting now, in the spring, just buy compost at the nursery so you can plant right away. If you start in the fall, you can add compost from kitchen mixed with shredded newspaper. We put more than 50 wheelbarrow loads of compost on our garden extension. I had no feeling in my arms after that.

5. Plant. You can plant right into the compost. Really, you can. Peas, lettuce, spinach can all go in now. Or you can let it process and plant later. Which is what we did; it hung out from October until April.

Last Sunday, we dug into the lasagna and it was gorgeous! Dark brown, lots of worms. The cardboard had decomposed for the most part, but no hint of grass was to be found underneath, just lots of wonderful soil. The temperature was up to 60 F, thanks to all the microbes hard at work. We got to work moving the strawberries over.

When my parents retired they moved from Spokane to Vancouver, WA. Also, they were moved from a five-acre lovely property to a condo in downtown. My mom had never been without a garden. And I was in need of helping managing ours. So, she brought transplants with her - six strawberry and a rhubarb plants. (She also has container gardens on her balcony where she gets a better tomato crop than I do.) The six little strawberry transplants have expanded and expanded, moving around the garden. Last summer the patch was so thick and wide that we could only harvest about 1/3 of the berries. It was sad watching so many go to waste. Thus the garden extension. Sunday, Mom and moved plants to create four long, roughly 40 feet long, rows. Even at that, there were about 100 more plants that we just turned over. This year we are going to get to eat every last berry; well, except the ones the birds and slugs steal.

March 20, 2011

Lost and Forgotten Skills

It seems that many life skills have been lost and forgotten. Take sewing for instance. How many people know how to darn a sock? Repair a hem that has come undone? I actually have many a friend who can do this. But lately, more people know how to program their Wii to stream movies, then can put a button back on a shirt.

There are lots of reasons why these skills are going away. The cost of clothing is one thing. You can get a T-shirt for $5. When a seam rips, you just toss it and get a new T-shirt. Also the convenience and variety. Any style pant comes in at least a dozen sizes, plus tall sizes, so you can always find the right length - no hemming needed. I've picked out a shirt at a store and some stitching had come loose. There was nothing wrong with the shirt other than that. I showed the lady at the cash register and she sold it to me for 50% off. It took me 15 minutes to fix the seam. Since then I actually look for clothes with minor, fixable flaws.

I learned this sewing skill, along with most of my domestic abilities, from my mom. She is a great seamstress. Growing up, Mom made all my and my brother's Halloween costumes. She made my wedding dress. And now she sews cute spring and winter dresses for Jordan. My learning started somewhere around the age of 10. I remember making a shirt and matching shorts outfit. It was really fun looking through the patterns, choosing fabrics. And then getting to wear something I made - bragging to my friends! It was great. Together we made many outfits including my 8th Grade Promotion dress, which was the first semi-formal I owned. Nowadays I have little time for big sewing projects like that. The last I did was a 1940's style bathing suit to wear as a costume. That was about 4 years ago. Lately the most complicated sewing I perform is turning Jordan's pants into shorts.

Last week one of my coworkers brought over a bunch of kids clothes for another. There were lots of cute dresses for her 3-year-old girl. One was a lovely homemade, white dress with little flowers stitched on the front. But apparently the grandmother had forgotten or ran out of time to add buttons and button holes. My coworker, Marisol, was saying "Well, I guess Vivian could wear it as a smock." I said "I could put button holes in that for you." "Really!?" exclaimed Marisol (in a tone as if I had just said I could perform open-heart surgery on my desk.) I said "Sure, I'd be happy to add some buttons." My other co-worker Roberta, with whom I share a pod, chimed in with "Could you lengthen the hem on a pair of pants I bought?" Probably. She offered to trade something for the work. She makes great food - maybe I'll ask for a home-cooked meal. Looks like I have a new side business at work, to go with my egg selling.

It's a little sad that people are forgetting skills like sewing or knitting or canning. I'm not sure why it feels sad to me, but it does. I guess that's why I refuse to forget. I spend hours growing, pick and processing green beans when there are perfectly good ones at the store. Maybe one day Jordan will be interested too and I can pass on the skills my mom taught me. That'd be pretty cool!

January 10, 2011

The Catalog is Here!

I picked up the mail and hidden amongst the unwanted post-Christmas sales, credit card offers, phone bill and tabs for the car was my 2011 Territorial Seed Company catalog! Roughly one hundred pages of seeds, starts, fertilizers, floating row covers, tools, etc. I grabbed the booklet, smiled at Jeremy and Jordan and said "I'll be in my room for a while."

Geek-out is the best way to describe how I feel about seeds and starts. I actually read the descriptions and compare days-to-harvest, disease resistance and sugar content. Every year there some new varieties to check out. I'm not talking about crazy, introduce wheat DNA into corn, varieties. These are just crosses that bring out the best qualities of the plant - the same thing humans have been doing for thousands years.

I do have my favorites like "Precocious" a sweet, yellow corn with a 75 day growing period. Since we are in the pacific northwest, anything that takes much more than that is difficult unless started inside a month early. Which is why I put up the shelf. I plan to start cantaloupe, honey dew, Brussels sprouts, acorn squash and butternut squash on that shelf.

After about 30 minutes I emerged from my room with pages dog-eared and stars and circles on the options. A second read through over breakfast narrowed the choices down a bit. Now the catalog is with my mom ("Yay, it's here! Can I take it home?") for the next week. Then we'll figure out The List. I'm so excited!

November 20, 2010

Pumpkin Pie

Pumpkin pie is my second most favorite dish of Thanksgiving, right after stuffing. I start craving it the day we cut the pumpkins from the vine and put them in the garage, which was late September. (Thank goodness for Burgerville's pumpkin milkshakes that tide me over until Thanksgiving.)

Although it adds more time, I firmly believe that pumpkins pie should only be made from freshly baked pumpkins not canned. Why am I so adamant about fresh baked pumpkin vs canned? Both are nothing more than pureed baked pumpkin, right. The problem is that to can pumpkin, it has to be heated to a very high temperature to remove any bacteria (I've done this in the pressure cooker). That process can remove a lot of the sweetness and flavor, not to mention destroying vitamins. Fresh baked is just yummier. Of course, if you don't have the time, canned will work just fine.

It takes a couple hours to bake whole pumpkins until they are soft enough to puree. So typically I do a bunch, like 4 or 5, small sugar pumpkins and then freeze what we don't need. In case you aren't familiar with pumpkin varieties, sugar pumpkins are the small ones with darker orange skins rather than the big ones you make jack-o-lanterns out of. The big ones have thin shells, which is good for cutting scary faces but that's a lot of volume to bake without a lot of puree for your pie. Plus the big ones are not very sweet.

Mom's Pumpkin Pie
Makes 2 pies
Time = 4 hours (or a bit more)

Ingredients
2-3 sugar pumpkins (5 1/2 c puree)
4 eggs
1 1/2 c sugar (add 1/4 c more sugar if using canned pumpkin)
1 t salt
1 t cinnamon (2 t if using canned pumpkin)
1 t ginger
1/2 t cloves or nutmeg
3 1/3 c canned milk

Directions
Place pumpkins in a rectangle baking dish with about 1 inch of water. Bake at 350 F for 2 hours until soft when punctured with a knife. All to cool for 30 minutes. Cut each in half and remove the seeds. Peel off the skins. Place pumpkin flesh in a blender and puree until smooth. Measure out 5 1/2 cups. Freeze what you don't need for use in muffins or milkshakes.

Beat eggs with a fork. Stir in pumpkin. Add dry ingredients. Add milk and stir thoroughly. Pour evenly into prepared 2 pie crusts.* Bake at 350 F for 45 min or until a knife inserted in the middle comes out clean. Cool for 10 minutes before serving.

*Unfortunately, I don't have a great pie crust recipe. If you do, please share it with me as a comment.

November 14, 2010

Concussion

Yesterday we came home from a long day to find two lost dogs in the front yard. Our Saturday started out by leaving the house at 7:30am to attend Science Olympiad. The Battle Ground School District hosts this yearly event. After four weeks of "trainings," students from 3rd and 4th grade elementaries across the district compete in 5 science events. It was grueling and by the end Jordan was tired and grump from not winning any awards. Plus it was 1pm and she hadn't eaten since 7am - we decided ice cream was in order. Then lots of errands on the way home.

Finally at 4pm I was home and headed out to feed the animals. I opened the door to find a maybe-one-year-old yellow lab mix dog bounding around. I grabbed him/her. She had a collar and licence with a phone number. But before I could do anything, a second twin dog came playfully running around the corner of the garage. The cats ran for cover.

I like dogs and don't have a problem with them in the yard, but they tend to harass the sheep and chickens, both of which really, really don't like dogs. We've had a small, white, puffy, yappy dog go round and round the chicken run freaking them all out while her own chased her for 15 minutes. So I would rather not have dogs in the yard. Best place for these two lost dogs was the barn until I could get a hold of the owners.

Holding on to the one I had, I opened the door a crack and called for my mom to come help. (Jeremy was elk hunting this weekend and my mom was staying with me and Jordan.) Mom got the second dog and we headed for the barn. These dogs were so excited by the sights and smells, they were pulling us. I was digging my heals in trying not to run. As soon as the one I had by collar saw the chickens, he/she bolted and I knew I was going down. My reaction was to tuck-and-roll. But it was less of a roll and more of a land-on-my-head, wrench-my-neck, and skin-my-hands technique. And I lost the dog.

My mom came running down, worried I broke my neck. I'm sure it looked that way from her view. But upon seeing I was conscious and movable, she went back to getting the dogs in the barn. After the little stars disappeared from around my head, I gathered myself and went back to the house to clean my hands and call the owners - I got a voice mail and left a message. Mom came back to the house once the dogs were secured.

When I became a mom and Jordan was old enough to play on a playground, I recalled the first aide knowledge learned from my mom. Namely, to check for a concussion look to see if one eye's pupil is larger than the other. My mom instantly wanted to check my pupils. One was in fact larger than the other. I went into the bathroom to see for myself and sure enough - my left pupil was larger than my right. The next question was "So what do we do." Neither of us was sure. Apparently all previous checks of my pupils since I was 3 years old resulted in no further action. But this was different. I decided to call the advice nurse at Kaiser. The nurse actually giggled when I told her I hit my head by performing a tuck-and-roll with a dog. Nice. But she was very helpful. We ran through a litany of tests. Were my pupils reacting to light - getting smaller with a flashlight shined into each. Turns out that is more important than the size difference because most people aren't symmetrical. Check, my pupils reacted to light. Was a vomiting? No. Did I have tingling in my fingers? No. Did I have ringing in my ears? No. Was there a blueish tint forming around my eyes or ears? No. Whew! But what about sleeping that night. When someone has a concussion the worst thing possible is to let them fall asleep - right?! The nurse suggested I have someone wake me up every 2 hours. That "someone" was my alarm clock.

I made it through night with no ringing ears, tingling fingers or blueish eyes. My mom checked my pupils again in the morning. And they were still different size - left larger than right. Guess I'm just not symmetrical.

October 17, 2010

Putting the Garden to Bed

Aka - five million loads of compost. Ok, that might be a bit of an exaggeration but it was at least 50 loads.

It has been raining every weekend for a month (sunny during the week when it is of no use to me). So when this weekend looked clear and warm, I decided to take advantage. My mom came over to help, which turned out to be key. If not for her the garden would be half to bed. And my arms would have fallen off.

We decided to expand the garden by 6 feet to accommodate two new rows of strawberries in the spring. Mom and I had taken a class in "lasagna gardening" last week and we put our new knowledge to work. First, we put down a weed barrier of card board and newspapers over the grass. Of course, as soon as the newspaper was in place a huge gust of wind blew the sheets all over and we had to redo half the plot. Second, we should have added a layer of sticks or pine cones to allow for drainage. But since the compost was made up of at 50% straw, and we didn't have 450 sq ft worth of sticks, we skipped that layer. Third, we put 50+ wheelbarrow loads of compost over the cardboard and newspaper. I did the pitchforking and hauling. Mom did the spreading and in between hauls she pulled up beans, squash, cucumbers, tomatoes, etc.

Two hours later the compost bin was empty. And my forearms were killing me! But the new lasagna bed looks great. It's about 8 inches thick of straw, manure and kitchen scraps. In four months it will be ready for strawberry plants.

The rest of the garden was stripped of vegetation. The non-edible parts went into the now empty compost bin while the edible parts went up to the garage. The last step was to broadcast field pea seeds. This cover crop will fix nitrogen all winter and in the spring it will be tilled under to add even more organics to the soil. Man we're good to the dirt! I need ibuprofen!